In our part of the world a flat yard is a rare thing. Even the “flat section” of our yard isn’t exactly flat – it’s more like flat-ish which makes putting up a pool more difficult. If you have a pool for your kids, you will want it on a flat surface. Without putting your pool on a flat surface it can actually be dangerous because of the risk of the sides collapsing due to the uneven spread of the water inside.
So last year when I went to set up the small family pool, I kept getting frustrated because one side would be full when the other wasn’t, that didn’t sit well with me. I came up with a temporary fix, but it wasn’t a great one and, like I said it was just temporary. So this post is all about how we created a level area of our yard which has been very useful for many other activities.
This year I did it right. If you are planning on making a flat area of your yard for your pool, know that you are in for a lot of work. It will be well worth it in the end. The less flat your yard is, the harder and more time consuming this project will be, so keep that in mind. We also did this project on a budget. You can always hire someone to do this for you with heavy machinery but then the costs are just enormous and for us would not be worth it.
If you have a similar problem and need a flat space to set up a pool, patio, garden, or even a flat sitting area.
Reasons Why You Need Even Ground For Your Above-Ground Pool
The Pool Can Break, Become Weak And Compromised
This is the biggest and most important reason that you have to put your pool on a flat surface. If your pool is on a slope no matter how minor that slope is, it can cause stress on different parts of your pool. This stress can lead to weaker sides which then can cause a collapse of the pool. This is what we don’t want to happen which is why having a level ground for your pool is essential.
If your pool break it can then flood your yard, causing additional damage.
Water Level Will Be Uneven
Depending on the size of your pool, an uneven level will cause water too change the depth of one side. You would then have a deep and shallow end which might sound fun, but for young children this can be dangerous. This also causes problems with playing in the pool. Everything is going to ‘drift’ to the deeper side.
Tools You Will Need To Level Your Ground
When we first started this project we knew we would try to do it a cheap as possible. We wanted to utilize the tools that the everyday homeowners should have on hand. There are tools you can get that will make this job faster and easier but then those will have a higher cost.
Here is what you will need for this project:
- Shovel & Metal Rake – You will need to dig out a spot in your yard to lay the foundation of your level ground.
- 2×4 Wood – This will be determined on the size of your box or level area you want.
- Dirt & Sand – The amount of dirt and sand you will need will be determined below. This will be determined by the size of your flat area.
The tools you need are few which makes this project possible for the average homeowner.
5 Steps To Making A Level Area of Your Yard For A Pool
Step 1 – Select An Area You Want To Level
The larger the area, the more challenging it will be, so don’t make it too huge. Mine was 12′ x 12′ and it was a pretty big job. Also keep in mind that most pools aren’t that big. Our pool was about 9′ x 9′ so we made sure there was extra room within our flat surface.
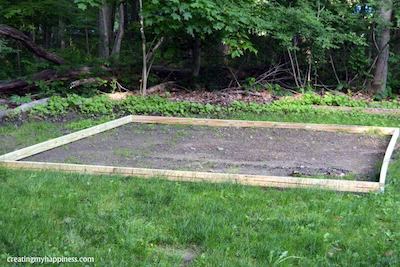
Build a box the size of the space you want. Remember that if you want the inside to be a certain area you need to account for the size of the wood. For my 12 x 12 box I used 2 – 2″ x 4″ boards that were 12′ long and 2 that were cut to 12’4″ to fit the 12′ x 12′ carpet I already had.
The measurements below assume you’re using the same size wood. If not, adjust as needed.
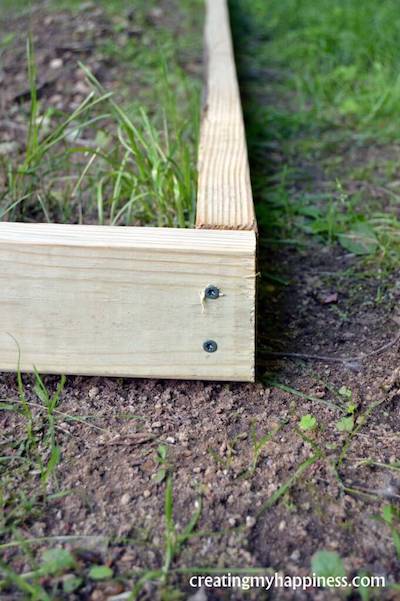
Pre-drill holes slightly smaller than the diameter of your screws on the 12’4″ board 1″ from each end.
Place the 12′ board against the pre-drilled holes perpendicularly and screw together using 3″ deck screws. Do the same until you have a box. This is the easy part.
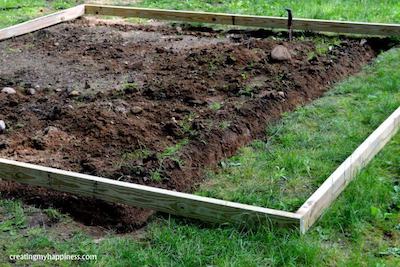
Step 2 – Clear The Area And Start To Dig
Dig a trench the same size of the box. At the higher end of the hill you’ll want the trench to be as deep as the board is wide – in my case, 4″ – and as flat as possible. I used a shovel to dig and trowel to even it out. Throw the dirt into the inside of the box, that way you won’t have to buy as much dirt to make it level.

Depending on how much of a slant you’re dealing with, you may not have to dig at all on the low side of the hill. I actually had to prop the box on a rock, then I used rocks to block the gap so the dirt wouldn’t escape. Fortunately for me, rocks are abundant in our area. You can also buy cheap garden blocks or stones at your local Home Depot or Lowes store. They are around $1.50 each block.

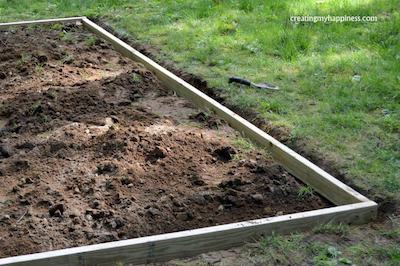
Step 3 – Start Filling Dirt Into The Box
Once the box is buried it needs to be filled. Count on needing to add about half the volume of the box in new dirt.
Here’s how to figure out the volume of your box.
Volume is length x width x depth. Make sure you are using the same units of measurement (inches, feet, meters, etc.). Since dirt is sold by the cubic foot, I used feet.
For my box the numbers worked out like this: 12 x 12 x .33 (4″ is 1/3 of a foot) = 47.5 cu. ft. So I’d need about 24 cubic feet of dirt to fill the box.
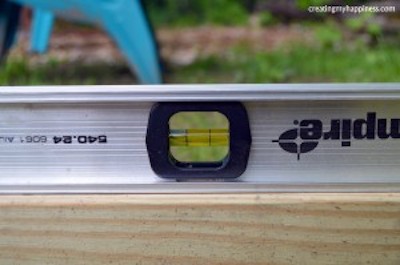
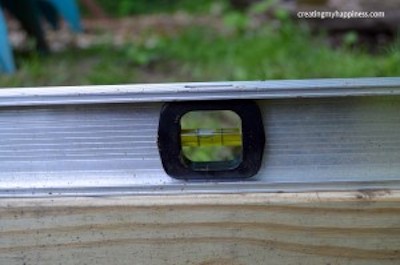
Step 4 – Level The Dirt
Finally, you need to level off the dirt. Once the dirt reaches the top of the box all the way around, use a stamper or just walk around to compact the dirt. It’s a good idea to wet the area at this point, just to help compact it a bit more. Wait for the water to drain and then add more dirt and repeat as many times as needed. (If this is going to be a garden, you don’t need to compact the dirt.) If you are leveling the ground for a pool, you will want to make sure it is packed solid.

Step 5 – Compact The Dirt And Level The Ground
The compacted dirt will be lumpy, so to make sure your space is level you will want to add a thin layer of sand. There is special sand for patios or you can use playground sand.
The easiest way to make sure it’s level is to use a flat board that spans the width of your box. You hold 1 end while someone else holds the other, and slide it across the box a few times – like you do when leveling a cup of flour in baking.
If you don’t have another person, or a long enough board, you can use any board and flatten out the dirt/sand like you are spreading peanut butter. It will take a bit longer, but it will work. Be sure to start in the middle and work your way out.
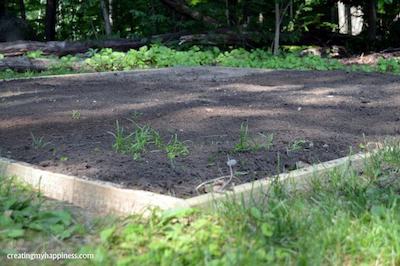
Here is what our level ground looks like and is great for our pool.
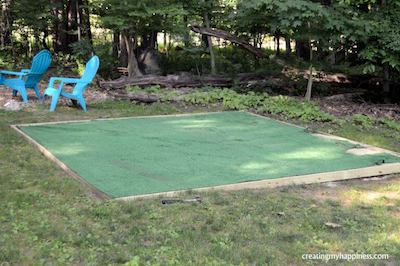
Step 6 – Setup Your Pool On Level Ground
Now its time to setup your pool on your new level ground. Remember you are only leveling the ground that is large enough to fit your pool. Be sure you make it larger than the pool you have. You can always double our measurements above to get a larger level ground for future needs.
I recommend an outdoor carpet if you are setting up your pool. It will help keep dirt and sand out of the pool and help define the space. I nailed one down with 8″ spikes so it won’t blow away in a stiff wind.


